Claim Your Free Saltwater Conversion Today
How to Detect a Pool Leak in 5 Easy Steps Before It Damages Your Yard
Spot the warning signs before water damage begins
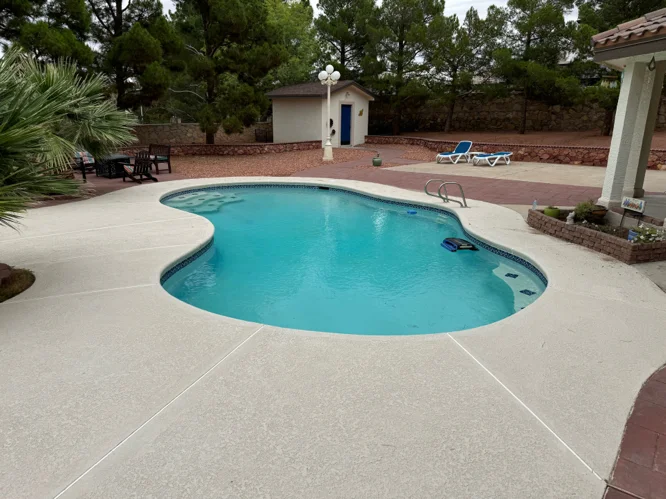
Step 1: Monitor Water Level Changes Over 24 Hours
The simplest and most telling indicator of a pool leak is a water level that drops faster than normal evaporation allows. In El Paso’s arid climate, evaporation is a constant reality during the warmer months, with pools naturally losing a quarter inch of water or more per day during peak summer heat. However, when the water line drops noticeably faster than this baseline, a leak is likely at work beneath the surface.
Begin by marking the current water level on the pool wall or skimmer with a piece of waterproof tape or a grease pencil. Choose a calm day when wind is minimal, as wind accelerates evaporation and can skew your results. Check the mark after 24 hours, taking note of how much the level has dropped. If the water has fallen more than half an inch in a single day during moderate weather, or more than three-quarters of an inch during hot, dry conditions, you are likely dealing with a leak rather than standard evaporation.
This test becomes even more accurate when you account for seasonal patterns. El Paso experiences intense sun exposure and low humidity from May through September, which naturally increases evaporation rates. During these months, a drop of up to a half inch per day may be normal. However, in cooler months such as October through March, when temperatures moderate and humidity rises slightly, any water loss exceeding a quarter inch daily warrants further investigation.
Keep in mind that pool usage affects water level as well. Splashing, dive entries, and active swimming all displace water out of the pool. If your household uses the pool heavily, factor this into your assessment. Conduct the 24-hour test during a period when the pool remains unused to isolate the leak from normal water displacement.
For pool owners managing commercial properties or larger residential installations, this step is foundational. A slow leak left unaddressed can saturate soil around the pool foundation, destabilizing the structure and leading to cracking, settlement, and costly pool repair services. Early detection through careful water level monitoring prevents these cascading failures and protects the investment in both the pool and the surrounding landscape.
Step 2: Perform the Bucket Test for Leak Confirmation
Once you have observed a concerning drop in water level, the bucket test provides a controlled comparison that isolates true leaks from evaporation. This method is widely regarded among pool service professionals as one of the most reliable preliminary diagnostics for identifying leaks without specialized equipment.
Fill a five-gallon bucket with pool water to within an inch of the rim. Place the bucket on the first or second step of your pool, ensuring it is submerged enough to remain stable but not so deep that water from the pool spills into it. Mark the water level inside the bucket and the water level of the pool outside the bucket using tape or a waterproof marker. Leave the bucket in place for 24 hours, avoiding pool use during this period.
After 24 hours, compare the two marks. Both the bucket and the pool will lose water to evaporation at roughly the same rate since they share the same environmental conditions: air temperature, humidity, and sun exposure. If the pool’s water level has dropped noticeably more than the water inside the bucket, you have confirmed a leak. The difference between the two measurements reflects the rate of water loss due to the leak itself, separate from evaporation.
In El Paso, where summer temperatures routinely exceed 95 degrees and afternoon sun beats down on exposed pools, evaporation alone can be misleading. The bucket test removes that variable and gives you certainty. If the bucket’s water level and the pool’s water level drop at similar rates, evaporation is the culprit, not a leak. If the pool loses significantly more water, it is time to move to the next detection steps and consider scheduling a leak detection service to pinpoint the source.
This test is particularly valuable for fiberglass and vinyl-liner pools, where small punctures or seam separations can cause slow, persistent leaks that are difficult to spot visually. It is also useful for older concrete pools that may have developed hairline cracks in the shell or around fittings. For commercial pool operators managing high-traffic facilities, the bucket test offers a low-cost, high-confidence diagnostic that can be performed on-site without downtime or service calls.
Step 3: Inspect the Pool Shell and Surrounding Deck
Visual inspection of the pool shell, tile line, coping, and surrounding deck often reveals the location of a leak before more advanced diagnostics become necessary. Many leaks originate at points where materials meet: tile joints, skimmer mouths, return fittings, and the bond beam where the pool wall meets the deck. These junctions experience thermal expansion and contraction, especially in El Paso’s climate, where daytime heat and nighttime cooling create constant stress on seals and grout.
Start by examining the waterline tile and grout. Look for discoloration, gaps, or areas where grout has pulled away from the tile. If the pool has been in service for several years, the grout may have deteriorated due to chemical exposure and UV damage. Water seeping through compromised grout lines can saturate the soil behind the pool wall, leading to settlement, soil erosion, and eventual structural problems.
Next, inspect the skimmer and return fittings. These are among the most common leak points in any pool. Check for cracks in the plastic housing, gaps around the mounting flange, or visible water seepage on the deck near the skimmer. Run your hand around the skimmer opening while the pump is off; any soft or spongy areas in the surrounding deck suggest water infiltration beneath the surface. Pay close attention to the weir door and throat area, where constant movement and chemical exposure can degrade seals over time.
Walk the perimeter of the deck and look for soft spots, settled areas, or sections where the concrete has cracked or separated from the coping. These symptoms often indicate subsurface water movement caused by a leak in the pool shell or plumbing. In El Paso’s caliche-heavy soil, water infiltration creates voids as it washes away fine particles, leading to rapid settlement and visible deck damage. If you notice any of these signs, a leak is almost certainly present.
For pool owners with tile water features, spillways, or vanishing edges, inspect the catch basin and weir carefully. These systems rely on tight tolerances and sound seals to function correctly. A small leak in a vanishing edge can waste hundreds of gallons per day and saturate the soil beneath the feature, threatening both the pool structure and nearby landscaping.
If you identify visible damage during this inspection, document the location and extent with photos and notes. This information will be valuable when you consult with pool repair services or schedule a formal leak detection assessment. Early identification of visible damage allows for targeted pool crack repair or pool tile repair before the problem expands into a full-scale renovation project.
Step 4: Check for Equipment and Plumbing Leaks
Not all pool leaks occur in the shell itself. In fact, a significant percentage of water loss originates in the circulation system: underground plumbing lines, pump seals, filter housings, heater connections, and valve bodies. These components are under constant pressure and subject to vibration, thermal cycling, and chemical exposure, all of which contribute to seal degradation and fitting failure over time.
Begin by inspecting the equipment pad. Look for standing water, damp soil, or rust stains around the pump, filter, heater, and valves. Even a small drip from a pump seal or a weeping valve can waste dozens of gallons per day and go unnoticed until the soil beneath the pad becomes saturated. Check the unions and threaded connections on all equipment; these are common failure points, especially if the system has been serviced recently and fittings were not properly tightened or sealed.
Next, examine the plumbing lines where they enter and exit the equipment pad. In many installations, PVC pipes transition from underground to above-ground at this location. The joints at these transitions experience stress from ground movement and thermal expansion, making them prone to cracking or separation. If you notice wet soil or water pooling near these joints, you have likely found the source of your leak.
For pools with underground plumbing, detecting leaks is more challenging but still possible with careful observation. Walk the route of the plumbing lines, if you know it, and look for areas where grass is unusually green, soil is sunken, or the ground feels soft underfoot. These are signs that water is escaping from a buried pipe and saturating the surrounding soil. In El Paso, where the soil drains poorly and tends to compact unevenly, even a slow underground leak can create noticeable changes in the landscape within a few weeks.
Run the pump and observe the system under pressure. Listen for hissing or spraying sounds, and watch the pressure gauge on the filter. A sudden drop in pressure when the pump is running can indicate a leak on the suction side of the system, while abnormally high pressure may point to a blockage or a failing valve. If you notice air bubbles returning to the pool through the return jets, this suggests a suction-side leak that is drawing air into the system along with water.
For commercial pool installations or complex residential systems with multiple pumps, heaters, and automatic chemical feeders, equipment leaks can be difficult to isolate without professional diagnostics. In these cases, scheduling a service call with a qualified pool contractor is the most efficient path forward. A trained technician can perform a pressure test on the plumbing system to pinpoint the exact location of the leak, saving time and preventing unnecessary excavation or demolition.
Addressing equipment and plumbing leaks promptly not only stops water loss but also prevents secondary damage. Water escaping from underground lines can undermine pool foundations, erode soil beneath decks and patios, and even threaten adjacent structures such as retaining walls or home foundations. For pool owners in El Paso, where soil stability is already a concern due to expansive clay and caliche layers, controlling subsurface water movement is critical to long-term structural integrity. Professional pool equipment repair ensures that leaks are corrected completely and that the system is returned to safe, efficient operation.
Step 5: Conduct a Dye Test for Pinpoint Accuracy
Once you have narrowed down the general area of a suspected leak through water level monitoring, bucket testing, and visual inspection, a dye test provides pinpoint accuracy. This technique uses a small amount of colored dye, typically food coloring or a specialized pool leak detection dye, to trace the flow of water at suspected leak sites. The dye is drawn toward any breach in the pool shell or fitting, revealing the exact location of even the smallest crack or gap.
To perform a dye test, first ensure the pool pump is off and the water is as still as possible. Any water movement will disperse the dye and make it difficult to observe the results. Choose a calm time of day, ideally early morning or late evening when wind is minimal.
Using a syringe, squeeze bottle, or dropper, release a small amount of dye near the suspected leak site. Common areas to test include tile grout lines, skimmer throats, return fittings, main drain covers, light niches, and any visible cracks or gaps in the pool shell. Hold the dye applicator close to the surface without disturbing the water, and release the dye slowly.
Watch the dye closely. If there is no leak, the dye will disperse gradually and drift with the natural currents in the pool. If a leak is present, the dye will be pulled directly toward the breach, creating a visible stream that traces the path of escaping water. This effect is unmistakable and provides immediate confirmation of a leak’s location.
In El Paso’s high-evaporation environment, dye testing is particularly useful for identifying leaks in areas that remain submerged year-round, such as main drains, step risers, and underwater bench seams. These locations are difficult to inspect visually and often go unnoticed until significant damage has occurred. A dye test conducted during routine maintenance or seasonal preparation can catch these leaks early, before they compromise the pool structure or surrounding yard.
For fiberglass pools, which are common in residential installations throughout the region, dye testing is invaluable for identifying delamination, gel coat cracks, and fitting failures. Fiberglass shells are durable, but they can develop stress cracks over time, especially if the soil beneath the pool settles or shifts. A dye test reveals these cracks even when they are too fine to see with the naked eye.
Concrete pools also benefit from dye testing, particularly in areas where the plaster surface has aged or where previous repairs have been made. A well-executed dye test can distinguish between a leak in the shell and a leak in the plumbing, preventing unnecessary and costly excavation.
Once you have identified the leak location with a dye test, document your findings and consult with a qualified pool contractor. Depending on the severity and location of the leak, repairs may involve epoxy injection, structural patching, pool resurfacing, or replacement of fittings and hardware. For pool owners managing commercial properties or high-value residential installations, working with experienced pool contractors ensures that repairs are performed to industry standards and that the pool is returned to safe, watertight operation.
Detecting a pool leak before it ruins your yard requires a systematic approach, starting with simple observation and progressing to more targeted diagnostics. By monitoring water levels, performing the bucket test, inspecting the shell and equipment, and using dye to pinpoint the breach, you can identify leaks early and take corrective action before soil saturation, structural damage, and costly pool renovations become necessary. For pool owners in El Paso, where heat, soil conditions, and water scarcity make every gallon count, these five steps offer a practical, effective path to protecting both your pool and your property.
Conducting the Bucket Test
The first step in detecting a pool leak is to establish a baseline for normal water loss. In El Paso’s arid climate, evaporation is a significant factor, particularly during the hot summer months when temperatures regularly exceed 95 degrees. However, distinguishing between normal evaporation and an actual leak is critical to preventing costly damage to your yard and pool structure.
Start by checking your water bill for any unusual spikes in usage. A sudden increase without a corresponding change in household consumption patterns often indicates a leak. Next, mark the current water level of your pool at the skimmer with a piece of tape or a waterproof marker. Monitor this level over a 24-hour period while the pool pump is running normally.
Under typical conditions in El Paso, you should expect to lose approximately one-quarter to one-half inch of water per day due to evaporation, depending on wind, humidity, and temperature. If you notice water loss exceeding this amount, particularly during cooler months or overnight when evaporation rates are lower, you likely have a leak that requires further investigation.
Keep in mind that factors such as splash-out from swimmers, backwashing your filter, or recent rainfall can affect water levels. For the most accurate reading, perform this test during a period when the pool has not been used and no maintenance activities have taken place.
Frequently Asked Questions
How do I know if my pool is leaking?
We recommend starting with a simple 24-hour water level test by marking the current level and checking it a day later. If your pool loses more than half an inch of water daily in El Paso’s summer heat, or more than a quarter inch during cooler months, you likely have a leak rather than normal evaporation. We also suggest performing the bucket test, which compares evaporation rates between your pool and a bucket of water placed on the steps, to confirm whether water loss exceeds normal rates. If you notice wet spots around your deck, unusually green patches of grass near the pool, or your pump struggling to maintain pressure, these are strong indicators that leak detection services are needed to prevent further damage.
How much water loss is normal for a pool?
We tell our El Paso customers to expect roughly one-quarter to one-half inch of water loss per day during the hot summer months due to evaporation alone, especially when temperatures exceed 95 degrees and humidity remains low. During cooler months from October through March, normal evaporation should not exceed a quarter inch daily. Anything beyond these benchmarks suggests a leak that requires immediate attention. We factor in local climate conditions when assessing water loss, because El Paso’s intense sun exposure and arid environment create higher evaporation rates than most other regions, making accurate leak detection even more critical for pool owners here.
Can I fix a pool leak myself?
We understand the appeal of DIY repairs, but most pool leaks require specialized equipment and expertise to locate and fix properly, especially when the leak originates in underground plumbing or within the pool shell itself. While you can perform preliminary tests like the bucket test or dye test to identify a leak’s general location, permanent repairs often involve pool crack repair, pool tile repair, or pool equipment repair that must meet structural and safety standards. We’ve seen many cases where attempted DIY fixes lead to more extensive damage and higher repair costs down the line. Our team uses pressure testing, electronic leak detection, and proven repair methods to ensure leaks are resolved completely the first time, protecting both your pool investment and your yard from water damage.
How long does it take to detect a leak?
We typically complete a thorough leak detection service within two to four hours, depending on the size and complexity of your pool system. Our process includes visual inspection, pressure testing of plumbing lines, and electronic leak detection equipment to pinpoint the exact source quickly and accurately. For straightforward leaks in accessible areas like skimmers or return fittings, we can often identify and assess the problem within an hour or two. Once we locate the leak, we provide a clear timeline for repairs, which can range from same-day fixes for minor issues to scheduled repair appointments for more involved work like pool resurfacing or underground plumbing replacement.
What happens if I ignore a pool leak?
We’ve responded to countless emergency leak situations in El Paso where delayed action led to thousands of dollars in preventable damage, and we want to help you avoid that outcome. Ignoring a pool leak allows water to saturate the soil around your pool foundation, which in El Paso’s caliche-heavy and expansive clay soil creates voids, settlement, and structural instability that can crack your pool shell, undermine your deck, and even threaten nearby retaining walls or home foundations. Beyond structural damage, an undetected leak wastes hundreds to thousands of gallons of water monthly, driving up your utility bills and requiring constant chemical rebalancing as fresh water dilutes your pool chemistry. We also see accelerated equipment wear when pumps run dry or strain against low water levels, shortening the lifespan of expensive circulation components. The longer a leak goes unaddressed, the more extensive and costly the required pool renovations become, so we always recommend immediate professional assessment.